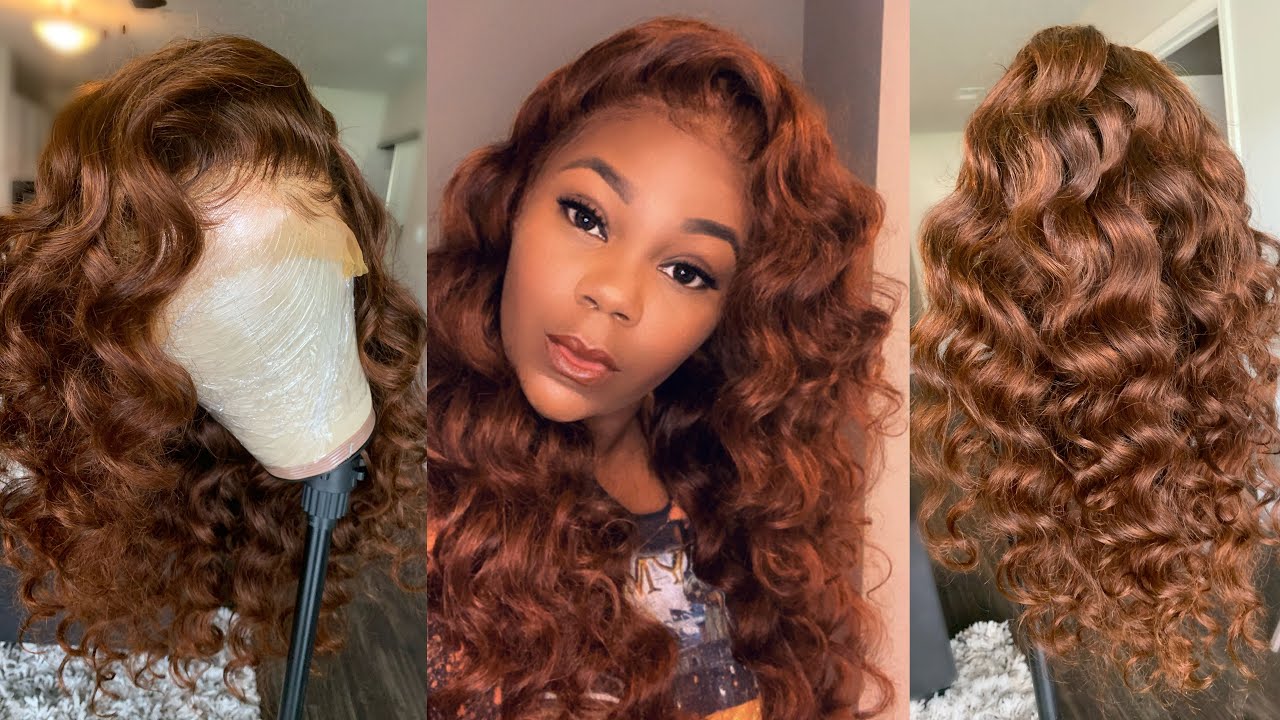
So, you’re thinking about changing up the color of your ginger wig, huh? Well, you’ve come to the right place! In this article, we’re going to show you how to dye a ginger wig in a different color. Whether you want to go for a bold new look or just switch things up a bit, we’ve got you covered. Keep reading to learn all the steps and tips you need to know to transform your ginger wig into the color of your dreams.
Now, I know you’re probably thinking, “Can I really dye a ginger wig a different color?” and the answer is yes, you absolutely can! Dyeing a wig is a great way to customize it to your preferences and express your unique style. In this article, we’ll provide you with a step-by-step guide on how to dye your ginger wig in a different color, from choosing the right dye to applying it properly. We’ll also share some helpful tips and tricks along the way to ensure you achieve the best results possible. So, if you’re ready to give your ginger wig a whole new look, keep reading and get ready to channel your inner stylist!
Choosing the Right Dye
Consider the Type of Wig Fiber
When it comes to dyeing a ginger wig a different color, one of the first things to consider is the type of wig fiber. This is important because different types of fibers will react differently to dyeing processes.
Synthetic wigs, for example, are made from artificial fibers that are not designed to absorb traditional hair dyes. However, there are special synthetic wig dyes available that can be used to color synthetic wigs. On the other hand, human hair wigs can typically be dyed using regular hair dye products.
So, before proceeding with dyeing your ginger wig a different color, make sure to check the type of fiber it is made from and choose a dye that is suitable for that particular type of wig.
Selecting the Appropriate Dye Color
Once you’ve determined that your wig can be dyed, the next step is to choose the right dye color. Selecting a color that complements your skin tone and personal style is essential to achieve the desired look.
There are various options available when it comes to dye color. You can opt for a subtle shade change, such as going from ginger to light brown, or go for a more dramatic transformation, like dyeing the wig in a vibrant red or even a completely different color like blonde or black.
It’s important to note that the final color result may vary depending on the original color of the wig and its fiber type. To ensure the best outcome, it’s a good idea to consult with a professional hair colorist or follow dyeing instructions specifically designed for wigs.
Preparing the Wig
Washing the Wig
Before you begin the dyeing process, it’s crucial to ensure that the wig is clean and free from any styling products or residue. To wash the wig, fill a basin or sink with lukewarm water and add a small amount of wig-friendly shampoo. Gently massage the shampoo into the wig, focusing on the strands and avoiding any unnecessary rubbing or tugging.
Once thoroughly washed, rinse the wig under running water until all the shampoo is removed. Be careful not to stretch or twist the wig while rinsing, as this can cause damage to the fibers.
Detangling the Wig
After washing, it’s important to gently detangle the wig to ensure even coverage during the dyeing process. Start by using a wide-toothed comb or a wig brush specifically designed for detangling. Begin at the ends of the hair and work your way up, gradually working out any knots or tangles.
Take extra care when detangling to avoid causing unnecessary damage to the wig. Slow, gentle strokes will help preserve the integrity of the wig fibers and reduce the risk of breakage.

Protecting the Wig Cap
Covering the Wig Cap
To protect the wig cap from accidental dyeing, it’s recommended to cover it with a plastic or vinyl cap. This will prevent any dye from seeping through and staining the cap, ensuring that the wig stays in optimal condition.
To cover the wig cap, simply place a plastic or vinyl cap over it and secure it in place with bobby pins or hair clips. Make sure the cap covers the entire cap area, including the hairline and neck area.
Applying Vaseline to the Wig Cap
In addition to covering the wig cap, it’s also a good idea to apply a thin layer of petroleum jelly, such as Vaseline, to the hairline and neck area. This acts as a barrier between the dye and the skin, preventing any potential staining or irritation.
Using a clean fingertip, gently apply a small amount of petroleum jelly along the hairline and neck, making sure to cover the entire area that may come into contact with the dye. Be careful not to apply too much, as this can make the wig cap slippery and difficult to handle.
Mixing and Applying the Dye
Preparing the Dye Mixture
Now that the wig is prepared and protected, it’s time to mix the dye. Follow the instructions provided with the specific dye product you have chosen, as the mixing ratios and application processes may vary.
In most cases, you will need to combine the dye with a developer or activator. Use a plastic or glass bowl to mix the dye and developer, following the recommended proportions. Use a whisk or a dye brush to thoroughly mix the two components until you have a smooth and consistent mixture.
Applying the Dye to the Wig
Once the dye mixture is ready, it’s time to apply it to the wig. Start by dividing the wig into small sections using hair clips or rubber bands. This will help ensure even coverage and make the application process easier.
Using a dye brush or a gloved hand, apply the dye mixture to each section of the wig, starting from the roots and working your way down to the ends. Make sure to saturate the hair thoroughly, ensuring that every strand is coated with dye.
Take your time during the application process to ensure that the dye is distributed evenly and that no sections are missed. Once the entire wig is covered, gently comb through the hair with a wide-toothed comb to ensure the dye is spread evenly.

Ensuring Even Coverage
Using a Comb or Brush
After applying the dye, it’s important to comb or brush through the wig again to ensure that the dye is evenly distributed. This step helps to eliminate any potential patchy areas and ensures a consistent color result.
Using a wide-toothed comb or a wig brush, carefully comb through the wig, focusing on each section to separate the strands and allow the dye to penetrate evenly. Take your time with this step to ensure that every section is adequately covered and there are no clumps of dye remaining.
Checking for Any Patchy Areas
Once you’ve combed or brushed through the wig, take a moment to inspect it for any patchy areas or missed spots. If you notice any uneven coloring, take a small amount of dye and apply it directly to the affected areas, using a fine-tipped brush or your gloved hand.
Make sure to blend in the additional dye with the surrounding hair to create a seamless transition. This will help achieve a more uniform color throughout the wig and avoid any noticeable discrepancies.
Letting the Dye Set
Following the Recommended Dye Processing Time
After applying the dye and ensuring even coverage, it’s important to let the dye set according to the recommended processing time. This time can vary depending on the specific dye product you are using, so be sure to read and follow the instructions carefully.
Set a timer or keep track of the processing time to avoid leaving the dye on for too long, as this can result in an overly intense or unnatural color. It’s essential to find the right balance and adhere to the recommended time for achieving the desired shade.
Wrapping the Wig in Plastic
To aid in the dye penetration and minimize any potential color transfer, it’s recommended to wrap the wig in plastic during the processing time. This helps to create a controlled environment and traps the heat, allowing the dye to work more effectively.
Gently place a piece of plastic wrap or a plastic cap over the entire wig, ensuring that all the hair is covered. Secure the plastic in place with bobby pins or hair clips, making sure that it fits snugly. This will help create a warm environment that allows the dye to process properly.

Rinsing the Wig
Gently Washing the Wig
Once the dye has processed according to the recommended time, it’s time to rinse the wig to remove any excess dye. Start by gently rinsing the wig under lukewarm water, allowing the water to flow from the roots to the ends to ensure thorough rinsing.
Avoid rubbing or agitating the wig excessively, as this can cause damage to the wig fibers. Instead, use gentle, slow movements to allow the water to remove the dye while preserving the integrity of the wig.
Removing All Traces of Dye
To ensure that all traces of dye are removed, continue rinsing the wig until the water runs clear. This indicates that the excess dye has been completely eliminated.
Take your time during this step to ensure that there are no remaining traces of dye in the wig. Pay close attention to the hairline and neck area, as these are often more prone to retaining dye residue.
Conditioning the Wig
Using a Wig-Specific Conditioner
After thoroughly rinsing the wig, it’s essential to restore moisture and prevent dryness by conditioning the wig. Opt for a wig-specific conditioner that is formulated to nourish and hydrate wig fibers.
Apply a generous amount of conditioner to the wig, starting from the roots and working your way down to the ends. Use your fingers or a wide-toothed comb to distribute the conditioner evenly, ensuring that every strand is covered.
Allow the conditioner to sit on the wig for the recommended time specified on the product packaging. This will give the conditioner enough time to penetrate the hair and provide the necessary nourishment.
Detangling and Moisturizing the Wig
After the conditioning time is up, gently comb through the wig to remove any tangles or knots. Start at the ends and work your way up, using slow, gentle strokes to avoid causing damage.
Once the wig is detangled, rinse it thoroughly under lukewarm water to remove the conditioner. Make sure to remove all traces of the conditioner to prevent any residue buildup and potential damage to the wig fibers.

Drying the Wig
Air Drying the Wig
When it comes to drying the wig, it’s best to avoid using heat styling tools, such as hair dryers or curling irons. Excessive heat can damage the wig fibers and cause them to become brittle and prone to breakage.
Instead, opt for air drying the wig. Start by gently squeezing out any excess water from the wig, being careful not to twist or wring it. Then, place the wig on a wig stand or a clean towel and allow it to air dry naturally.
Avoid exposing the wig to direct sunlight or excessive heat sources, as these can also cause damage to the wig fibers. Find a cool, well-ventilated area to let the wig dry completely before moving on to the next steps.
Avoiding Heat Styling Tools
Once the wig is dry, it’s important to remember to avoid using heat styling tools, including curling irons, straighteners, or hot rollers. Heat can cause the color to fade or even change, compromising the vibrancy and integrity of the newly dyed wig.
If you want to change the style of the wig, consider using heat-free styling methods, such as braiding, twisting, or pinning. These techniques can help achieve different looks without the need for heat, preserving the color and quality of the wig.
Styling and Finishing Touches
Restyling the Wig
After the wig is completely dry, it’s time to style it according to your desired look. Use your fingers or a wide-toothed comb to gently manipulate the hair into the desired style. You can create curls, waves, or straighten the hair, depending on your preferences.
Take your time during the styling process to avoid tugging or pulling on the wig fibers. Gentle, slow movements will help maintain the color and integrity of the wig, ensuring a beautiful and natural-looking result.
Trimming any Uneven Ends
If you notice any uneven or frayed ends after dyeing and styling the wig, it’s a good idea to trim them to achieve a polished and finished look. Use a sharp pair of hair cutting scissors and carefully trim the ends, making small, precise cuts.
Take care not to trim too much off at once, as this can result in an uneven or choppy appearance. It’s better to make gradual trims until you are satisfied with the overall shape and length of the wig.

Maintaining the Color
Using Color-Safe Shampoo
To prolong the vibrancy and longevity of the newly dyed wig color, it’s essential to use a color-safe shampoo during regular washing. Regular shampoos can strip the color from the wig, resulting in a faded or dull appearance.
Opt for a shampoo specifically designed for color-treated hair or wigs. These shampoos are formulated to cleanse the hair without stripping away the color, helping to maintain the richness and vibrancy of the wig color.
Avoiding Direct Sunlight
Direct sunlight can be damaging to both the wig fibers and the color. UV rays can cause the color to fade and the fibers to become dry and brittle. Therefore, it’s important to protect the wig from prolonged exposure to sunlight.
When wearing the wig outdoors, consider using a wide-brimmed hat or scarf to provide shade and protect the wig from UV rays. Additionally, storing the wig in a cool, dark place when not in use can help preserve the color and prevent any fading or discoloration.
Avoiding Common Mistakes
Not Rushing the Process
Dyeing a wig requires patience and attention to detail. Rushing the process can lead to uneven coloring, patchy spots, or even damage to the wig fibers. Take your time to ensure even coverage, double-check for any missed areas, and follow the recommended processing times.
By allowing sufficient time for each step of the dyeing process, you can achieve a more professional-looking result and avoid potential mistakes or mishaps.
Applying Too Much Dye
While it’s important to ensure even coverage, applying too much dye can lead to an overly intense or unnatural color. Excessive dye can also cause the wig fibers to become weighed down or sticky.
To avoid this, follow the recommended dye mixing ratios and apply the dye in thin, even layers. This will help achieve a more natural and balanced color result and prevent any unnecessary damage or buildup on the wig.
Verifying Results
Checking the Color in Natural Lighting
After the wig has been dried, styled, and trimmed, it’s important to assess the color in natural lighting. Indoor lighting can sometimes give a false impression of the color, so stepping outside or near a window can provide a more accurate representation.
Evaluate the color in different lighting conditions to ensure that you are happy with the final result. If desired, you can make minor adjustments by applying additional dye or toner to achieve the perfect shade.
Adjusting if Desired
If the color is not exactly what you had envisioned or if you want to make further adjustments, there are options available to modify the color. You can use color-correction techniques or consult with a professional hair colorist who can offer guidance and expertise.
It’s essential to remember that dyeing a wig is a creative process, and sometimes adjustments or modifications may be necessary to achieve the desired look. Don’t be afraid to experiment or seek professional assistance to ensure the best possible outcome.
Conclusion
Dyeing a ginger wig a different color can be a fun and transformative process. By considering the type of wig fiber, selecting the appropriate dye color, and following the necessary steps to prepare, protect, and apply the dye, you can achieve a beautiful and vibrant new look.
Remember to take your time, follow the instructions carefully, and maintain the color by using color-safe products and protecting the wig from direct sunlight. By taking these precautions and avoiding common mistakes, you can enjoy the vibrancy and longevity of your newly dyed wig.
So go ahead, embrace your creativity, and enjoy your transformed ginger wig in a different color!